Docker and containers are pretty nifty. You can run applications or even OSes inside containers (sort of, it shares a kernel with the host OS and there’s still at least some ways to escape a container to get to the host). The beauty of it to me is how throwaway it is. I saw a presentation where someone started an Ubuntu container, rm -rf /’ed themselves, created a new container, and it was like nothing ever happened. Amazing stuff.
I won’t pretend I’m getting the most possible out of docker or even understand it fully, but the learning curve required to get a whole lot of functionality out of it is really shallow. I have Docker installed in a VM. Like I described earlier, I got it working well enough and then snapshotted it. If you’re not paying attention to what you’re doing, you can run into a lot of errors and annoyances you don’t see coming.
Some Use Cases and Ideas
Docker is a really handy way to run things temporarily. There’s an excellent implementation of Mutillidae that makes for a good test range, base Ubuntu Images, LAMP stacks, and on and on and on.
One of my favorites is Splunk. Sometimes, I’ll get a large amount of logs or data I need to go through quickly. If you’ve never used Splunk, it really is an amazing tool. It indexes data quickly and lets you run very complex searches. The problem is the full version is expensive and the free version has limits. There’s this happy in-between trial enterprise version. You can index a certain amount of data until it warns you, but it won’t stop you. You can ingest several gigabytes of data into a single splunk index, do what you need to do, and then get rid of it. If you’re snapshotting or pausing the container, you can get that data right back without reindexing it. If you forget, just spin up a new container and you’re ready to restart.
Another test case I’m sure has never happened to any incident responder anywhere is that a server becomes ground zero for an incident but it wasn’t logging to a central logging server. Now you have gigabytes of data you need to go through quickly and no way to do it. Splunk can be really useful for situations like these (which probably never happen).
There’s another really interesting project called CyberChef. Some nice fellow at GCHQ spent their free time building it. I’ll write a post on it later, but the short of it is you can take data, encrypt, decrypt, encode, decode, alter, arrange, whatever it until you have what you want. It’s really an amazing tool.
This post will go into some examples of how to use Docker and cover some pitfalls I’ve run into.
Installation
There are some pretty good guides to installing Docker out there. There’s the official documentation and plenty of others. This is the setup that worked for me in November 2016 and still works last I checked a week ago.
Install necessary packages
1
sudo apt-get install docker.io linux-image-extra-$(uname -r) linux-image-extra-virtual git
Add yourself to the appropriate group
1
sudo usermod -aG docker $USER
Reboot to make sure everything sticks and force you to log back in so group permissions take
Log back in and enable the service
1
2
systemctl start docker
systemctl enable docker
Splunk
Splunk is great Running it in a docker container is greater. I tend to run cheap with VMs and not provision huge drives or anything, so it’s important for me to run them lean. Since my VMs are small and disk space is at a premium, the default minimum free space setting splunk has before it stops indexing of 5GB is pretty greedy for my tastes. I changed up the Dockerfile on the official Splunk repo to require a minimum of 500MB free in my forked version. I literally changed only one line, so you can just clone the original repo and edit it yourself or just fork mine. The change was on line 42 and 43 of docker-splunk/enterprise/Dockerfile.
1
2
42 && rm -rf /var/lib/apt/lists/* \
43 && sed -i -e 's/minFreeSpace = 5000/minFreeSpace = 500/' /var/opt/splunk/etc/system/default/server.conf
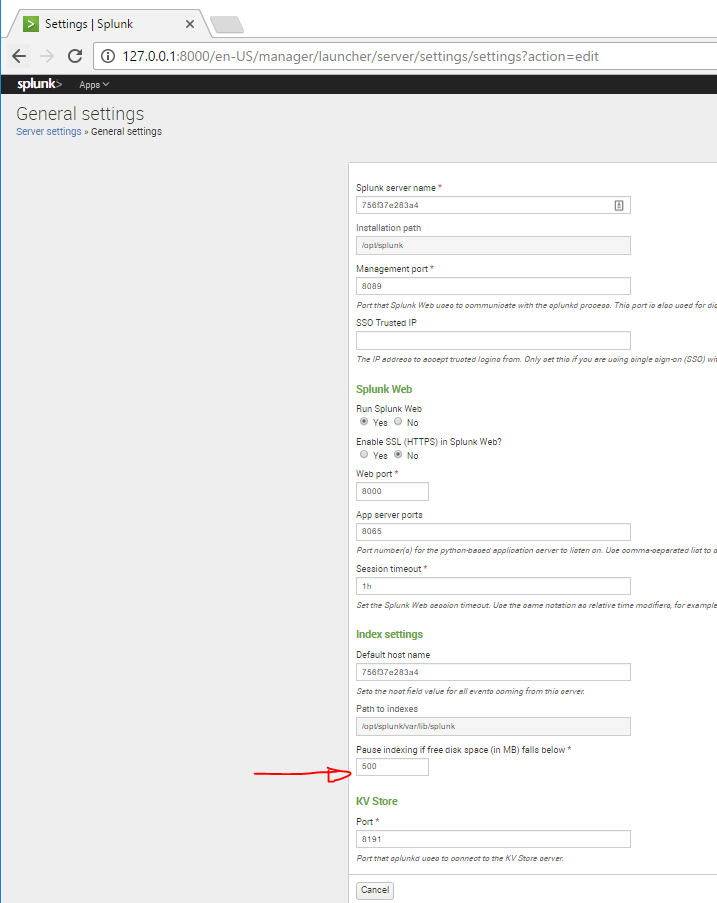
Replacing the server.conf minFreeSpace variable means indexing will keep running until you have only 500mb free, which is easier to swing than 5GB. If you need to change it further, you can, but at that point its probably better just to make a bigger disk.
For this example, I’ve created a /data directory and copied my VM’s /var/log/ directory into it just so we have some data to work with. To run the image, clone the repo, cd into the enterprise directory and do:
1
2
3
docker build -t splunkminfree .
<let it run and build>
docker run -d -e "SPLUNK_START_ARGS=--accept-license" -e "SPLUNK_USER=root" -p "8000:8000"  -v /data:/root/ splunkminfree
If you watch the build happen, you can see where docker replaced the config file as it was building the image.
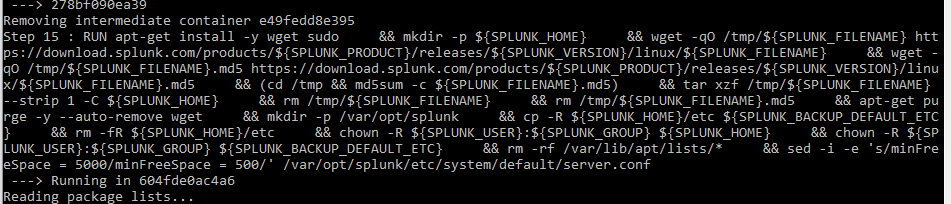
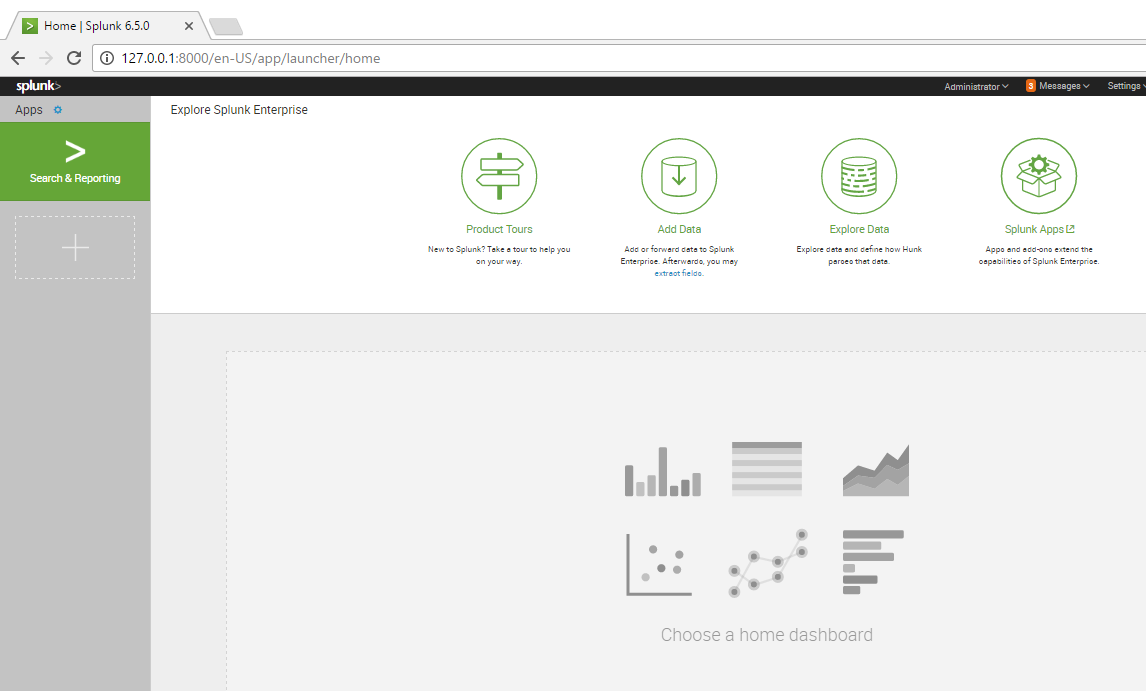
If you did it right, you’ll have a container available at your VM IP on port 8000. It takes a minute or two to start up and you may have to enable port forwarding if your VM is NATed and not bridged. Once you update the default password, you’re at the start screen!
If we check our settings page, we can see our sed we did in the Dockerfile took place before execution, so we don’t need to restart the Splunk service, it booted up with our changes in place. This is important because if you do your changes as part of the entrypoint.sh script or elsewhere that’s not in the Dockerfile, your container can start up services before changes are made, making you restart them to get where you wanted to be to begin with.
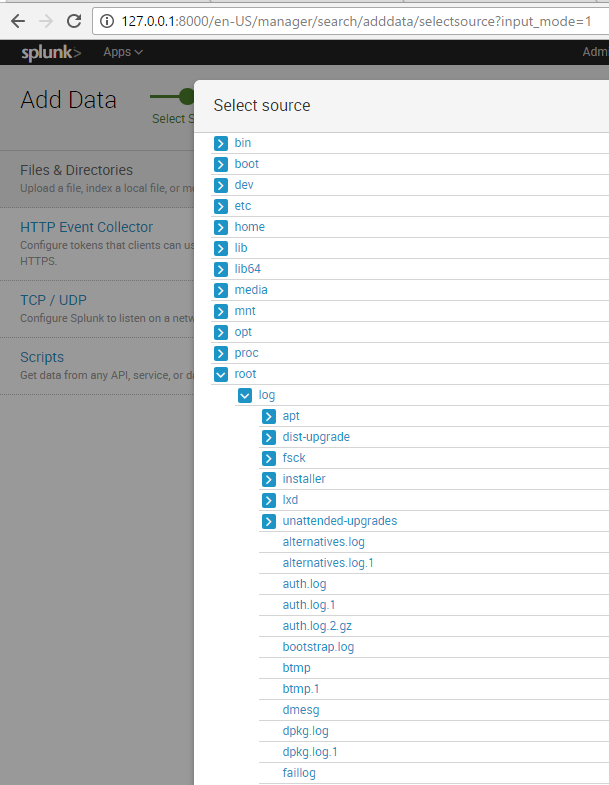
So now we have a working splunk instance, it loaded data at /data, and we can search it. You can change the destination mount directory to whatever you want, but since I sent it to the root user’s home folder, I need to find it there.
Indexing will take a little bit depending on how much data you have, but there it is! You can now do all the wonderful things you can usually do in Splunk.
I think that’s all I want to go over for now. I’ll do a part 2 on this soon and go over Cyberchef.